Weekly Step by Step
1. Create a new roster
Create a new roster file by copying the previous week’s roster.
In the model browser, take a copy of a previous week’s roster by selecting the previous roster and then using the Copy and Paste options from the Edit menu.
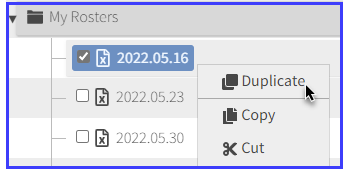
Alternatively you can use the Duplicate function from the right click-menu
Then rename it and change the name to reflect the date of the new week.
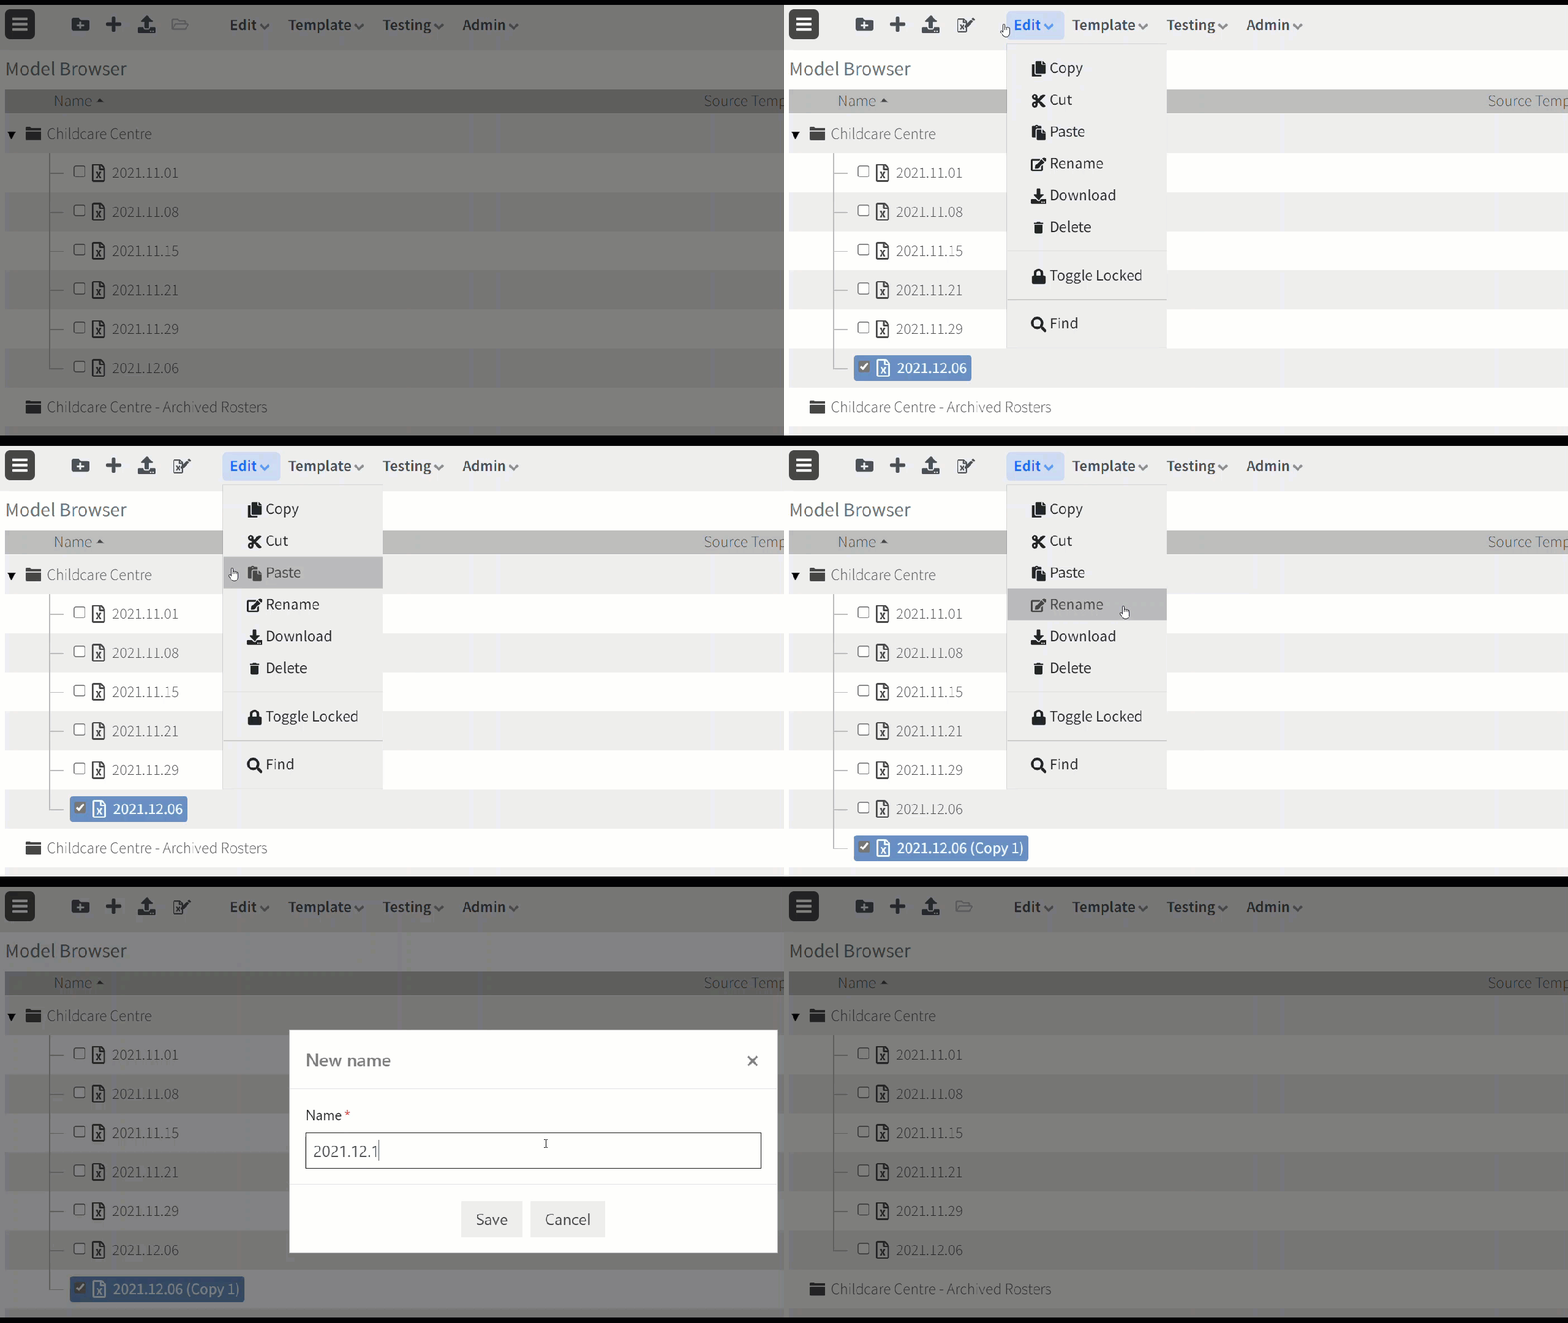
Tip: Using a naming format of YYYY.MM.DD e.g. 2022.05.30 will keep rosters in date order.
2. Set the date
Set the date on the roster for the first Monday for the week to be generated.
Select the Roster Group

and then the Roster or Roster (Breaks) view.
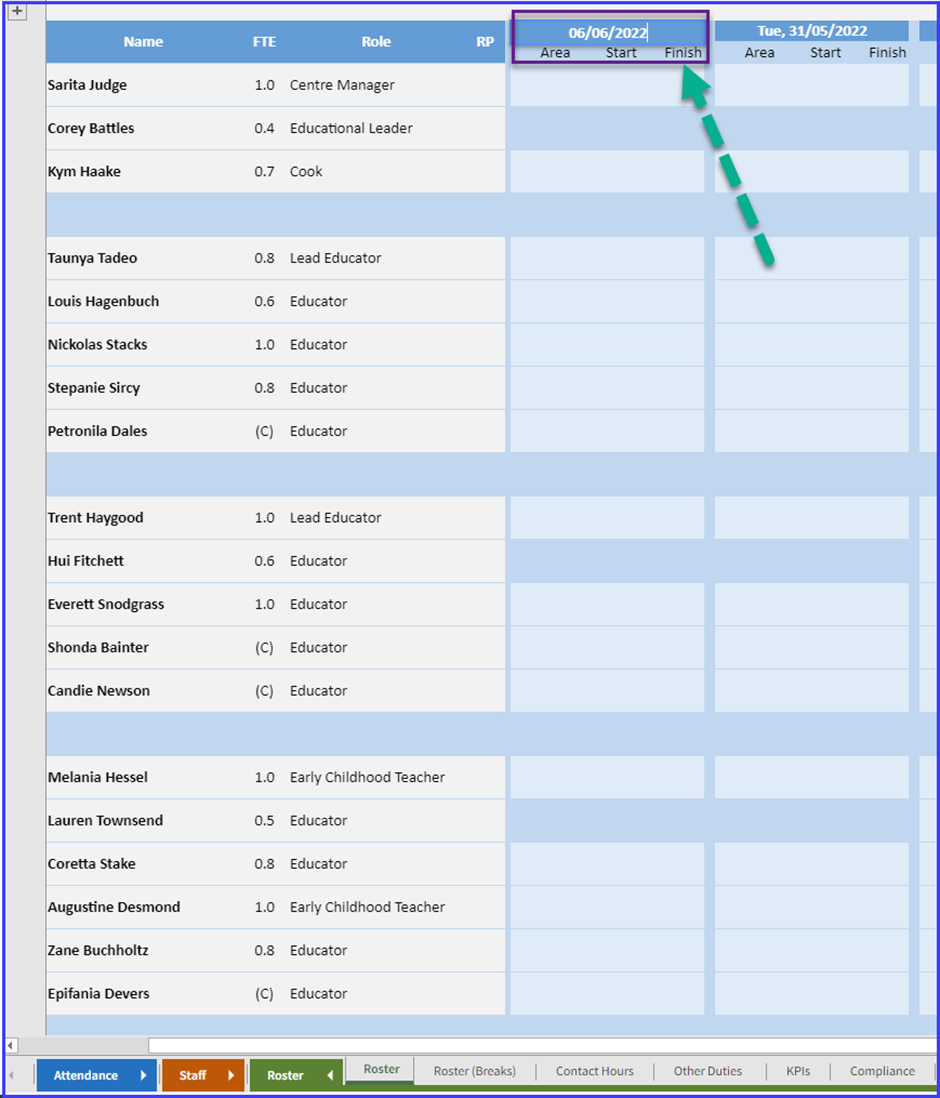
Press Enter or Tab or click elsewhere on the screen and the rest of the days are automatically updated.
3. Import any new data
If Daitum is integrated with your payroll and/or SISO applications you may some “cloud” icons.
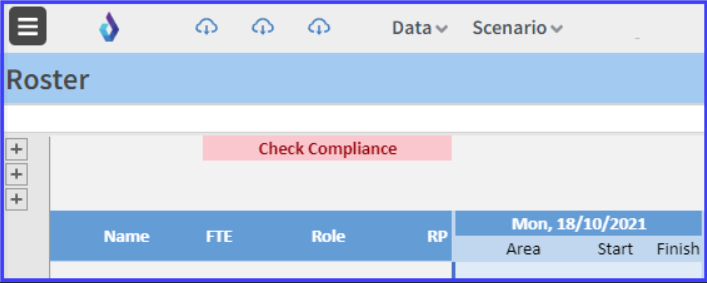
Hovering over them will reveal a tool tip explaining what data is available for updating.
e.g. Payroll Data, Leave Data, Planned Attendance and SISO (sign-in and sign out) data.
Click each of the icons to import the new data. They will disappear when the data has been imported successfully.
Payroll
Importing the Payroll data will do the following
Add new staff members to the payroll view
Remove staff members that no longer work at the centre from the payroll view
The Roster Order view will need to be modified to add new staff members or remove staff as needed.
Any staff that don't appear on the Roster Order will have a NO in the In Roster column on the Payroll view.
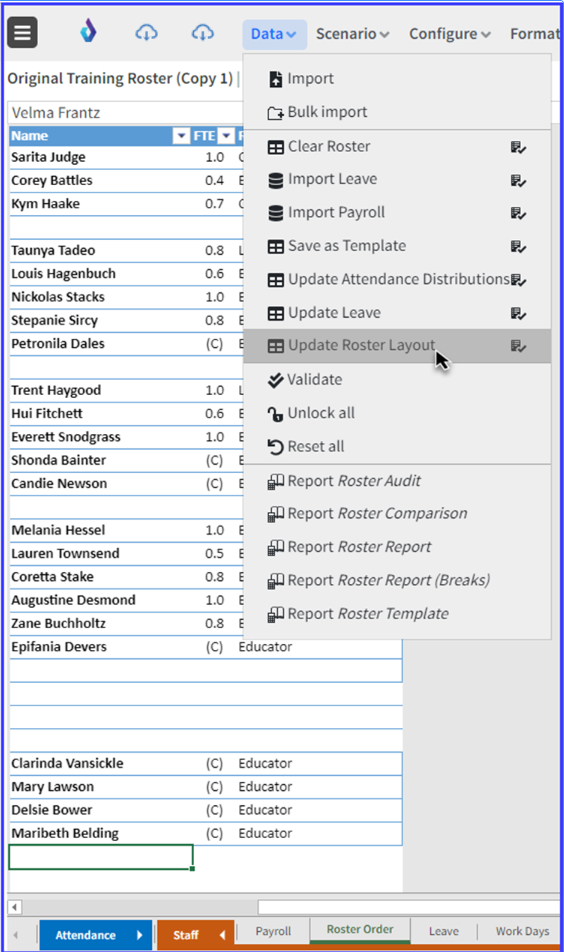
Important: After making any changes to the roster layout, you will need to run the update the roster layout process.
This is done by selecting Update Roster Layout from the Data menu.
Sign-In Sign-Out (SISO) data
Importing the SISO data will bring in the most recent attendance patterns for your centre which allows Daitum to understand the daily patterns of arrivals and departures for children in each age group.
Leave
Importing the leave data will update the leave on the Leave view which means people will not be rostered on for the days when they are on leave.
Planned Attendance
Importing the Planned Attendance numbers will update the data on the Planned Attendance view which is the number of children attending your centre for the week you are rostering.
4. Check Planned attendance
Select the Attendance group

and then the Planned Attendance view.

Check that the expected number of children that will attend on each day for each Area (age-range) for the week being rostered.
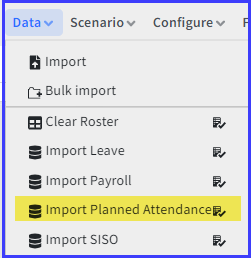
If not, either manually update the numbers, or Import Planned Attendance from the Data Menu after checking that the roster date has been set correctly (from step 1)
5. Enter Other Duties
Select the Roster Group

and then the Other Duties view.
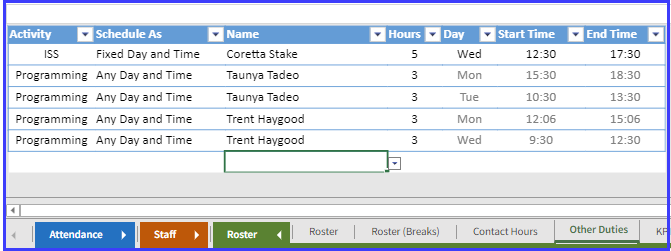
Enter any training, programming or other duties for staff members during the roster period.
Enter the number of hours to spend on the activity and then they can choose from the following options:
Any Day and Time - Daitum will choose the best day and time for the activity
Fixed Day - You can select the day but Daitum will find a time on the day
Fixed Day and Time - You will enter the day and start time and end time of the activity.
6. Generate the Roster
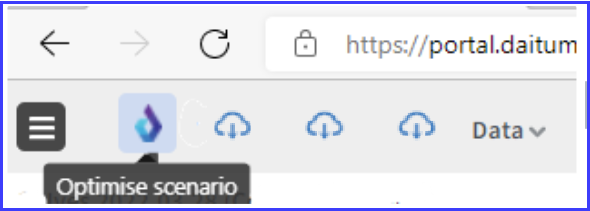
From the roster view, click the Optimise Scenario button which has the Daitum logo as the icon
7. Review Compliance
After optimising, if the roster view shows ‘check compliance’, click on the ‘Compliance’ view to review any issues identified.

If the issues are a fraction or small number of hours per day this can generally be handled on the day.

If there are large numbers this may indicate there are not enough available resources, or that there are too many restrictions in place, such as contracted hours, fixed start times or not enough staff areas listed against staff. Reviewing these settings may allow Daitum to produce a more effective roster.
8. Publish Roster
Once you have reviewed the roster and made any adjustments needed, click the ‘Publish roster’ button. Depending on your organisation’s setup this will send the optimised roster to your payroll system, or automatically download the roster report that you can use to enter the roster into your payroll system.

Checklist
A checklist of the above steps is available here
